A good baby bottle routine has three parts: prepare the milk correctly, respond to the baby during the feed, and clean the bottle afterward. The bottle is only one part of that process. A clear routine helps every caregiver do the same important steps, even during a busy or tiring day.
Feeding3 products, compared
Baby bottle routine: from preparation to a comfortable feed
Build a clear baby bottle routine for preparing a feed, responding to your baby's cues, handling leftovers, and keeping clean and used parts separate.
Jump to a section
The quick answer
For a first baby bottle, begin with the baby’s feeding needs and an appropriate nipple flow, then check assembly, handling, and cleaning. Hold the baby and bottle during feeds, never prop the bottle, and seek help for repeated coughing, poor intake, or distress.
- One correctly assembled bottle is more useful than a drawer of mixed parts.
- Watch the feed rather than pushing a target volume.
- Do not alter nipple holes or swap incompatible parts.
- Cleaning requires taking the bottle apart, not rinsing the assembled bottle.
At a glance
The details that make a difference when you’re deciding.
| Before the feed | During the feed | After the feed |
|---|---|---|
| Check correct parts and flow | Hold and observe the baby | Disassemble every component |
| Prepare milk or formula safely | Respond to pauses and feeding cues | Wash, rinse, and air-dry |
| Keep instructions accessible | Stop and assess persistent difficulty | Store dry parts in a clean place |
A closer look
Products mentioned in this guide
Actual product photos, manufacturer information, and direct links. Comparisons are based on published specifications; these are not hands-on test results.
01Dr. Brown’s Natural Flow® Anti-Colic Options+™ Wide-Neck Baby Bottle with Level 1 Slow Flow Nipple, 5oz/150mL02Baby Bottle Gen 203Dr. Brown’s™ Soft Touch Bottle Brush
01
Trying a vented plastic bottle
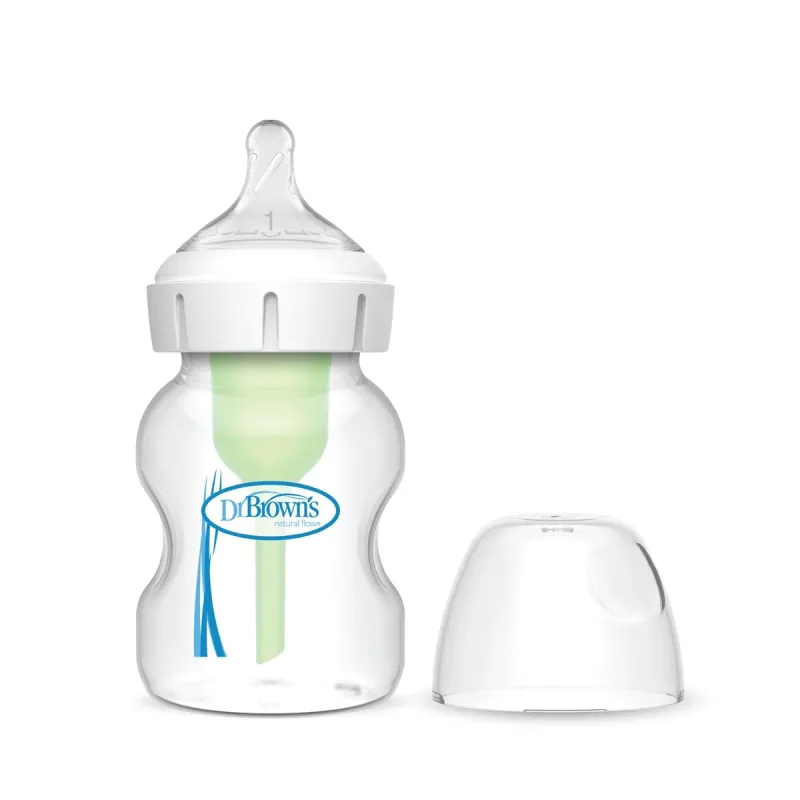
Dr. Brown’sDr. Brown’s Natural Flow® Anti-Colic Options+™ Wide-Neck Baby Bottle with Level 1 Slow Flow Nipple, 5oz/150mL
Dr. Brown’s Options+ Wide-Neck 5 oz bottle uses a separate internal vent and a shaped nipple. The practical question is whether the baby feeds comfortably and whether the adults can clean all the parts reliably. Treat the brand’s anti-colic wording as a product claim rather than a diagnosis or guarantee for your baby. Start with a small quantity and the appropriate nipple flow before committing to a complete matched system.
- 5 oz / 150 mL size
- Wide-neck design
- Separate internal vent
- Silicone nipple
Where it fits
- Compact size for smaller feeds
- Components and replacement nipples sold within the system
What to weigh up
- More small parts to wash
- Flow choice matters as much as bottle shape
02
A soft silicone bottle with a wide opening
Comotomo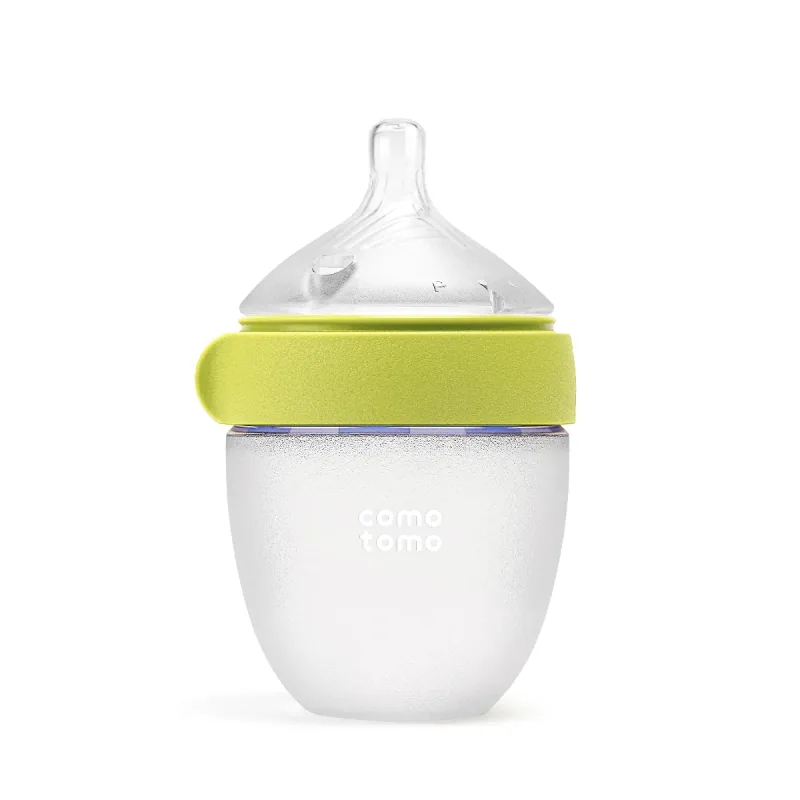
Baby Bottle Gen 2
Comotomo’s Baby Bottle Gen 2 uses a silicone body and a wide-mound nipple with built-in vents. The wide opening changes the hand-cleaning experience compared with narrower bottles, while the softer body changes how the bottle feels in the hand. It does not establish that every breastfed baby will accept it. Check current nipple-flow options, sterilization instructions, and any warmer or machine compatibility before investing in multiple bottles.
- Food-grade silicone body
- Wide opening
- Built-in nipple vents
- Wide-mound nipple
Where it fits
- Fewer separate vent pieces
- Soft bottle body
What to weigh up
- Baby acceptance cannot be predicted
- Check fit in bottle warmers and washing racks
03
Manual cleaning with a dedicated bottle tool
Dr. Brown’s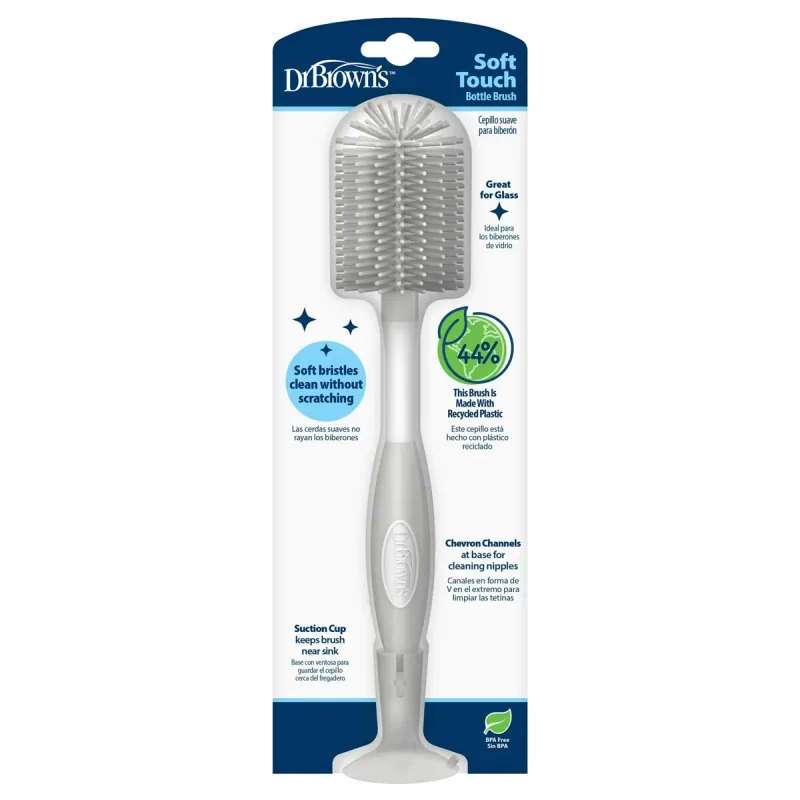
Dr. Brown’s™ Soft Touch Bottle Brush
Dr. Brown’s Soft Touch Bottle Brush uses synthetic-rubber bristles and a nipple-cleaning feature at the base. It illustrates the low-equipment alternative to a countertop bottle washer. Check that the brush reaches your bottle’s shoulders and bottom without damaging its surface, then clean and air-dry the brush itself. A brush is only one part of the process: bottles still need disassembly, washing, rinsing, and complete drying on a clean surface.
- Synthetic-rubber bristles
- Non-slip handle
- Nipple-cleaning feature at the base
- Manual cleaning tool
Where it fits
- No appliance or proprietary tablet needed
- Separate access for smaller nipple spaces
What to weigh up
- Handwashing takes active time
- Brush must also be washed and dried
Prepare the feed before settling into your chair
Wash your hands, choose a clean bottle, and check that the parts belong to the same compatible system. Inspect the nipple and assemble it according to the instructions.
For formula, follow its preparation directions exactly. For expressed milk, follow current storage and handling instructions from your healthcare team or the CDC. Do not treat the two as interchangeable when calculating how long a prepared feed can be kept.
Warming is optional unless your clinician has given special instructions. Do not microwave a bottle because it can heat unevenly. Keep a cloth and other needed supplies within reach before you begin.
Hold the baby and watch the cues
The CDC feeding guidance recommends holding your baby during bottle feeds, keeping them supported, and allowing pauses. Avoid bottle propping or leaving a baby alone with a bottle.
Watch for early signs of hunger and fullness rather than using the amount left as the only measure of a successful feed. A baby can turn away, relax, or stop sucking when they have had enough.
Keep the nipple filled with milk while holding the bottle at an angle that lets your baby control the pace. If coughing, choking, or persistent difficulty occurs, stop and seek professional guidance about the feeding setup.
Make pauses part of the routine
A short pause can give you time to observe whether the baby wants more or needs a different position. Keep the baby's head and body supported when changing position.
If you use a burp cloth, position it before lifting the baby toward your shoulder. Change damp clothing or fabric when needed. Cleanup supplies should make handling easier without crowding the baby's face.
Repeated discomfort, forceful vomiting, blood, poor growth, or feeding refusal needs medical advice. A different nipple or a larger collection of cloths cannot substitute for assessment.
Track leftovers clearly
Do not add fresh milk to a partially used bottle for the next feed. Formula remaining after a feed should be discarded; expressed milk has its own handling limits. If you are uncertain what is in a bottle or when it was prepared, resolve that question before offering it.
Use a simple label or shared note when several adults prepare feeds. Time, contents, and the person responsible are more useful than a color-coded system nobody remembers.
For formula-specific timings and mixing guidance, read our baby formula guide.
Try the full routine with one bottle before buying more
Open the package and identify each part against the instructions. Assemble and disassemble it before a hungry baby is waiting. Check that the adult can read the volume markings, tighten the collar correctly, and hold the bottle without covering a vent in a way the instructions prohibit.
For a concrete comparison, the Dr. Brown’s Options+ Wide-Neck 5 oz bottle has a separate internal vent, while the Comotomo Gen 2 builds vents into the nipple. The difference becomes obvious when the parts are laid out for washing. Choose with that daily task in mind rather than judging only the assembled silhouette.
Make the feed responsive and observable
Support the baby and follow guidance from the clinician or feeding professional about positioning and pacing. Watch for pauses, turning away, and other cues rather than trying to finish a bottle because a particular amount was prepared. Do not leave the baby alone with a propped bottle or place a bottle in the sleep space.
If coughing, choking, repeated pulling away, or tiring happens, describe the pattern to the pediatrician. Record which nipple and flow are in use and whether the issue occurs consistently or only at certain feeds. A change in equipment may be part of the response, but a product page cannot determine why feeding is difficult.
Troubleshoot a leak without changing several things at once
Check the exact assembly order, nipple seating, collar tightness, and vent instructions. Inspect for cracks, tears, warped pieces, and residue around sealing surfaces. A small mismatched component can look nearly identical to the correct one, so use the model name when ordering replacements.
If the manufacturer provides a troubleshooting guide, follow it before buying another bottle style. Do not add tape, glue, an improvised gasket, or a homemade vent hole. Keep damaged parts out of the clean supply drawer so another caregiver cannot accidentally return them to use.
Build a clean-to-used system around the bottle
Keep used parts separate from clean ones, wash in a clean basin or suitable dishwasher setup, and allow all components to air-dry thoroughly. A dedicated bottle brush such as Dr. Brown’s Soft Touch Brush can reach surfaces, but the brush itself also needs cleaning and drying. The CDC cleaning guidance is the reference for the complete process.
Avoid wiping dry with a used kitchen towel. Put fully dry parts away in a clean, protected place and handle nipples with clean hands. Sanitizing requirements can be more important for babies younger than two months, those born prematurely, or those with weakened immunity; ask the care team how that applies to your routine.
Pack the next feed rather than an entire kitchen
Take the number of clean bottles needed for the realistic interval before proper washing, with a separate container for used parts. Follow the storage rules for the milk or formula being carried. A travel warmer changes temperature, not the safe storage clock.
Keep a simple note for another caregiver naming the bottle, nipple flow, preparation instructions, and any individualized feeding advice. Once the routine works, buying more of the same compatible system can be practical. For a broader comparison of materials and bundles, see the baby bottles buying guide.
A few more details
Your questions, answered
Should I make my baby finish the bottle?
Follow fullness cues rather than forcing a fixed amount. Discuss intake or growth concerns with your pediatrician.
Can I prop a baby bottle while I do something else?
No. Hold and supervise your baby during the feed so you can respond to their breathing, pace, and cues.
Can I fix a slow nipple by making the hole bigger?
No. Do not alter nipple holes. Check assembly and the correct flow option, and ask for advice when feeding seems difficult.
Does a bottle warmer extend safe milk storage time?
No. Warming does not reset storage limits. Follow the guidance for the milk or formula and discard unfinished formula as directed.
Sources & product information
Follow the original sources for current product details, instructions, and guidance.